Hi there,
would like to report here about the construction of my first Revolution kite. I have followed one or the other threat, planted the idea among friends and at one or the other kite festival and always got great tips or alternatives for building. I would like to share these experiences with you bit by bit.
It all started with the wish to finally build a flyable Revolution-Kite myself. It’s something different than always concentrating only on buying and spending hundreds of Euros. Of course I don’t expect quality in detail at the beginning, but the experience will be worth it.
But how should it look like, which design should I use? Just make a copy? Just start with something monochrome?
NO – for this I have the claim to create something of my own, something that is individual and if necessary remains so.
As Nordlicht, better than hamburger, one day the picture of the Elbphilharmonie came to my mind, floor plan like a triangle and it was not the facade but the roof that caught my attention. From a bird’s eye view the waves are clearly visible, curved, up and down in motion. There it was born, the idea for the design of my own kite.
(Roof of the Elbphilharmonie in top view OR just search for „elbphilharmonie dach“ at Google)
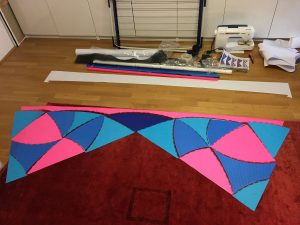
There should be three basic variants – Standard or UL – Mid-Vented – Full-Vented
These requirements resulted in 5 sketches in MS-Power-Point
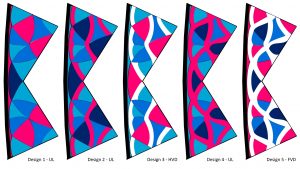
tried to match the Icarex colors – light blue, medium blue, dark blue and neon pink
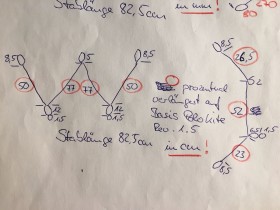
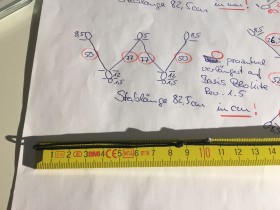
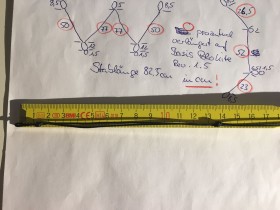
I use the manual for the Rev 1.2 – which is based on rods with a length of 82,5cm – and during the winter I will at least implement the designs 1 – Ultra-Light, 3 – Mid-Vented and 5 Full-Vented one after the other. I will make the leading edge a little bit different with a 4cm high arch in the middle and additionally I will make the gauze 2cm wide at the ends and 4cm wide in the middle.
To be continued …
Moin together and thanks for the first comments.
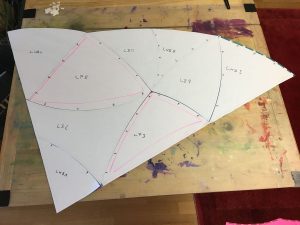
… have now transferred my sketches into CAD drawings. Use LibreCAD for this. I had to get used to the operation – the zoom-in and -out via the mouse. With my Mac mini and the Magic Mouse it was not so easy – it always went in and out in directions I didn’t want. Well, in the end it worked. With zoom-in/out the position of the mouse is crucial for the movement on the drawing.
I made the transfer from MS-Power-Point to LibreCAD using a JPEG sketch. Export from PPT and import into LibreCAD. Then start the conversion on a second layer and zoom the elements to the correct size.
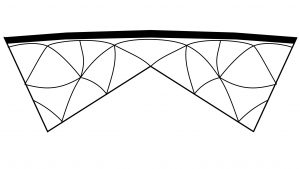
Now the fine work began in LibreCAD, drawing 2-point lines (straight) and 3-point lines (arc). Check the dimensions, first construct arcs continuously and then separate them into individual parts. The Trim/Both Trim and Offset functions proved to be very practical. With the offset I was able to construct the hem quickly and easily and simply used a dashed line for recognition.
I ordered the print from inexpensive plotting companies. To do this, set the paper in LibreCAD to 2500×900 cm and center the object in the print preview by hand or move it into the print area (!). It took me some time to figure out this step. Now nothing stood in the way of exporting to PDF format. I packed three files as a ZIP file and placed the order online. Before that I had a very friendly contact with the support hotline – it was my first order and I wanted to make sure I got what I wanted in the end.
I ordered the endcaps from Roger ( @chewbaka ) from feine-drachen and a roll-up bag as well. The main part of the material I ordered online at the kite market of Michael Ryll. I calculated everything in a rough estimate and here and there I calculated much too much for my three (3) planned kites. It is certainly a lesson or the possibility to build one or the other kite more
Here is my order list as an example :
15 pieces 200-442-Cam2 Skyshark PX 2 Camo cylinder. 82,5cm
6 pieces 299-068 Inner sleeve CFK 6.1 (6mm) x 100mm – full
1 piece 300-300 superglue 5g thin liquid
12 meter 500-084 Dacron 170g/m², 6cm – black
3 pieces 498-060 Double-sided adhesive tape 6mm wide – standard
1 piece 499-000 glass fiber adhesive tape 25mm
9 meter 500-469 gauze standard width approx. 10cm – black
2,5 meter 500-470-W gauze standard width approx. 150cm – in white
2,5 meter 500-328 Icarex pc31 neonpink 31g/m², approx. 137cm
2,5 meter 500-360 Icarex pc31 light blue 31g/m², approx. 137cm
2 meters 500-365 Icarex pc31 medium blue 31g/m², approx. 137cm
2 meters 500-370 Icarex pc31 dark blue 31g/m², approx. 137cm
30 meter 100-706 bridle line Liros 70kg black
3 pieces 300-397 sewing thread Avion E blue, Nm 60/3, 600m

Building material and plot – the work can begin ….
… I have an alternative for the transfer of JPEG images to DXF files for a CAD program:
I took the basic shape on the iPad-Pro as JPEG in Concepts, drew the lines with the ApplePencil, saved them in DXF format and then imported and completed them in LibreCAD.
An alternative for all those who prefer to draw the contours by hand and then process them in a CAD such as LibreCAD.
Greetings and continuation follows …
… work a little bit more on the building specifications.
Theory is all well and good, BUT experiences of active kite builders are certainly much better. Instructions here in the forum are one part, the other part are discussions and concrete tips that you can get on every kite meadow or every kite festival. At this point we would like to thank all kite pilots for their openness and mutual help which can be found everywhere.
at the kite festival in Münsingen, I talked to @Uli_Pfänder here and showed him my design. He itched immediately and he gave me a few tips from his wealth of experience:
1) for the sewing he suggested an alternative : for filigree shapes and ornaments – make a sail in the main basic color and then sew the ornaments or the small details onto the complete sail. Then cut the ornaments/small details freely from the back with scissors. The advantage is that the sail does not warp and the applied parts always lie flat on the sail.
2) to fix the different elements he mentioned two alternatives to do without the DS adhesive tape
a) textile spray adhesive – spray, wait 2min, press and sew
b) (and I found this much more exciting) along a seam with a soldering iron every 5cm puncture, similar to welding. in addition a glass plate as a base, a very fine soldering iron tip and best of all a template that allows the two materials to be pressed firmly together on the glass. this way you prevent holes from forming. Sew afterwards.
3) he pointed out again that the same side of the Icarex must always be on top so that the wind permeability is the same on both sides. We should therefore always be clear which is the front and which is the back of the fabric and mark it accordingly and take this into account in the processing
4) Uli is cutting with the soldering iron, he thinks that cutting with the cutter or scissors will cause fraying later
5) at the hem it is enough to turn the fabric once – under the seam the Icarex is doubled – I had thought that 2x turning is necessary and the Icarex is tripled
6) at the transition from the gauze to the sail no flipping is necessary – some instructions show flipping twice or even three times – but here you have to use DS tape, because the dotting (2b) does not work
7) in the triangle under the middle of the sail, it is important to reinforce the sail with Kevlar or another tear-resistant material in the hem – here the pull is strongest and the Icarex needs reinforcement – otherwise it will tear out.
8) for the template Uli suggested a thin aluminium foil or a thin aluminium sheet – this way the shape is always preserved – especially when you cut with the soldering iron. – especially if you want to build several kites
let’s see what I make of it, because I have more the single production in mind at the moment …
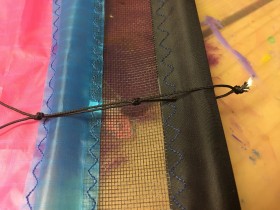
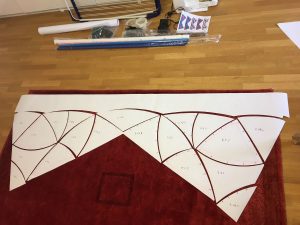
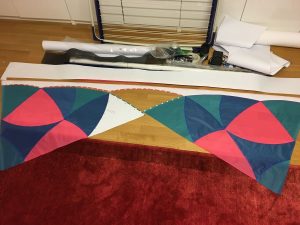
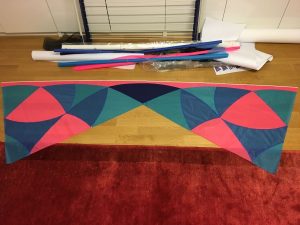
… the kite construction progressed and here are some pictures and comments on the technique used
1) I decided to use the template directly from the 1:1 paper plot. So don’t forget to cut out and label. I marked the elements with side of the sail, color and a consecutive number.
2) Place parts on the Icarex and ensure that they are arranged in mirror image. This will be very noticeable later in the sun and sky. Apply adhesive tape pointwise and use it as overlapping seam allowance at the same time. Adhesive tape cannot be applied completely because of the curves and bends, it is also not bad and represents a compromise between the dotting technique with the soldering iron and the use of DS adhesive tape for straight seams.
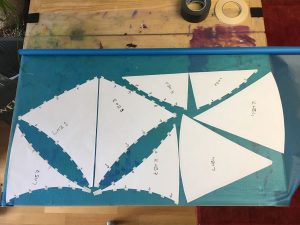
3) Cut out with the cutter-knife (either directly on the template or along the tape) and then fold it up to get a first impression.
4) Glue the elements together using the static adhesion of the template on the Icarex The templates can be butt joined to form the planned pattern.
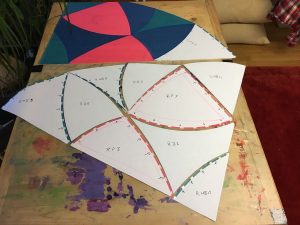
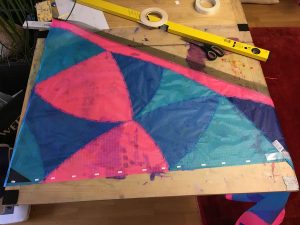
5) Remove paper from the template and join both halves of the sail to the element under the leading edge (goes along the whole length) as well as to the middle piece (dark blue). To attach the gauze I used a complete DS adhesive tape strip.
6) now go to the sewing machine and the gauze below the leading edge will be sewn to the sail without cover. I have tried to achieve mostly continuous seams and to move the beginning and end to the edge. I lifted the presser foot, turned the sail around the needle and then pulled the seam in a completely different direction.
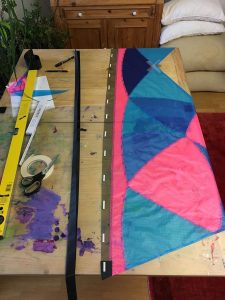
7) Then turn the hem over (again dotted with adhesive tape) and fix it with a straight seam. At the lower tips, the reinforcement of doubled Dacron is inserted and fixed with the same seam as the hem.
8 ) Mark the Dacron on the leading edge lengthwise after folding and on the gauze the sheet with DS adhesive tape on both sides. To reinforce and hold the end caps, Dacron strips are attached to the respective ends of the leading edge and sewn together. Fix the Dacron along the leading edge of the sheet first at the back and then at the front and sew it with a wave stitch. The order in which they are fixed makes it easy to reproduce the shape of the sheet.

9) Sail and leading edge are ready sewn, the two reinforcements for fixing the rods and for bridging the gauze of the leading edge at the same time are still missing.
Ready … 🙂
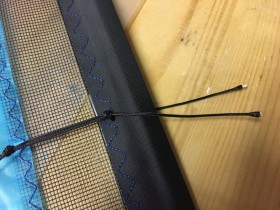
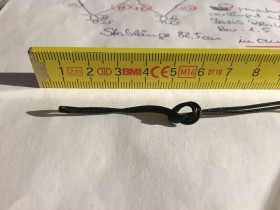
… not quite, because the fixing of the end caps follows. For this I melted holes in the Dacron with the soldering iron, pulled the rubber band through and knotted it. Finally the scale is made and fixed in the endcaps.
… only now it can start
After the sail comes the scale to complete a kite …
I use a modified scale of my PoloRev 1.5. I have lengthened the measures in percent according to the rod length from 790mm to 825mm (lengthened measures in red circle). The fixed point for the vertical rod at the upper leading edge is 700mm from the center, corresponding to about 500mm from the outside. The lower fixed point for the vertical bar is 850mm from the center.
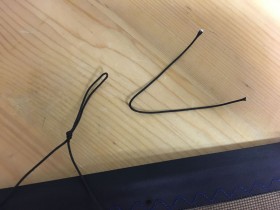
1) first action and question : How much of the line length disappears in one knot ? I use the Liros 70kg black as bridle line and it needs a length of 15mm per knot. How did I get that out? I take the line, fold it over after 12cm and make a knot for the first loop with a length of 8,5cm. But instead of 12cm the short end is now only 10,5cm long. This is the secret of the length dimension for ALL further steps.
2) next length section 50+12+1,5cm and then the addition for 2 knots, i.e. PLUS 3cm – fold the line at 66,5cm. Second knot at 1,5cm from the cover for the small loop, third knot 12cm away from the second for the big loop. If everything went well, the section between the third knot and the first one (the one for the first loop) is exactly 50cm long !?
3) next length section 77+5+1.5cm addition = turn over at 83.5cm line and set the next knot 5cm from the turn over. 5cm loop and 77cm distance to the third knot. correct !?
4) next section 77+12+1.5+3cm addition = at 93.5cm turn over the line Remove the knot at 1.5cm from the cover and then another one at 12cm distance. Distance to the knot of the 5cm loop is 77cm !?
5) last section 50+8,5+1,5cm addition = at 60cm line change over and knot the last 8,5cm loop.
6) lift 5cm loop and check symmetry of both ends. Are the knots of both sides side by side? Yes, then go to the vertical scale elements using the same principle.
7) Make two exactly identical vertical weighing elements :
- Make a line at 12cm turn, make a loop of 8,5cm
- turn the line at 26,5+2+1,5cm addition and knot 2cm loop
- line at 52+6,5+1,5+3cm addition turn over and knot 1,5cm loop and 6,5cm distance
- Turn the line over at 23+8,5+1,5cm encores and make a loop of 8,5cm.
8 ) both verticals worked the same? great 🙂
9) connect vertical and horizontal bridle lines together
- take the 2cm loop of a vertical one and lead it into a 12cm loop of the horizontal
- lead the 2cm loop over 1,5cm loop of the horizontal
- pull the horizontal (1,5cm and 12cm loop) to the end through the 2cm loop of the vertical
10) the 8.5cm loops of the horizontal and vertical bridle line are pulled through the holes of the end caps to attach them to the sail.
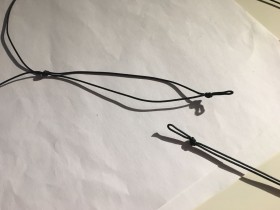
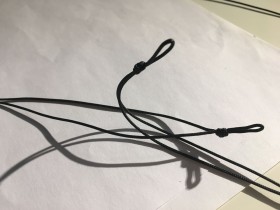
Pictures follow and also the attachment of the 5cm loop of the horizontal bridle line
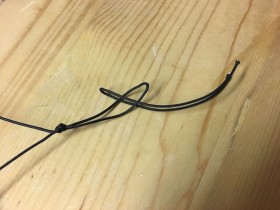
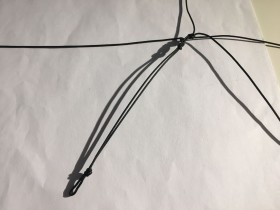
so now a few pictures to fix the scale to the sail
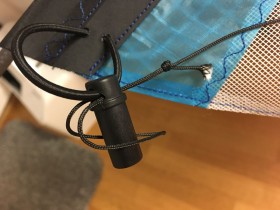
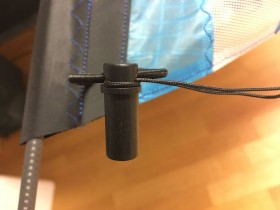
1) first at the end caps – ensure symmetry
- Pass the loop through the hole in the end cap
- Open/lace loop around the end cap
- Pull the rope tight … ready.
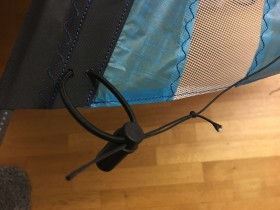
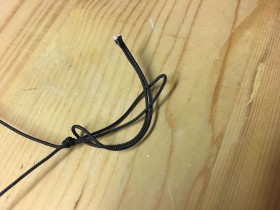
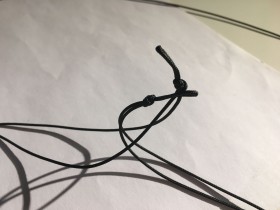
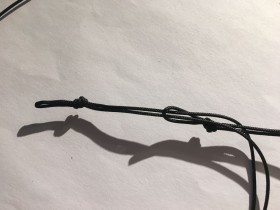
2) now only the mounting of the balance in the middle of the leading edge is missing
- loop should be 6cm long – I cut off at least 18-20cm of line
- first open line with 5cm loop of the horizontal connection
- then pull one leg through the hole in the dacron of the leading edge and …
- … knot.